Appearance
Skip to content This guide provides instructions for setting up a CI pipeline to build and deploy your game server into Metaplay's managed cloud.
Dependencies
- Sign up to the Metaplay Portal - To deploy a game server to the Metaplay Cloud, you need to set up an organization, project, and environment for your game in the portal.
- Migration From R26 - If you started your project with Metaplay R26 or earlier, you'll need to apply a one-time migration to add some Helm values files to configure your environments. Check out the Release 27 Migration Guide for Managed Environments for the steps.
Overview
This guide provides step-by-step instructions for setting up a CI system to build and deploy your game server into a Metaplay-managed environment.
It is a simple two-step process, as detailed below:
- Create a machine user on your organization in the developer portal with proper access.
- Set up your CI pipeline to build and deploy the game server through the machine user.
If you wish to build and deploy the server manually instead, you can follow the steps in Manually Deploying a Game Server to the Metaplay-Managed Cloud. However, we strongly recommend using CI pipelines!
Creating a Machine User in the Portal
First, you need to create a machine user that you can utilize to access the Metaplay cloud from your CI pipeline. You can do so by following the steps below:
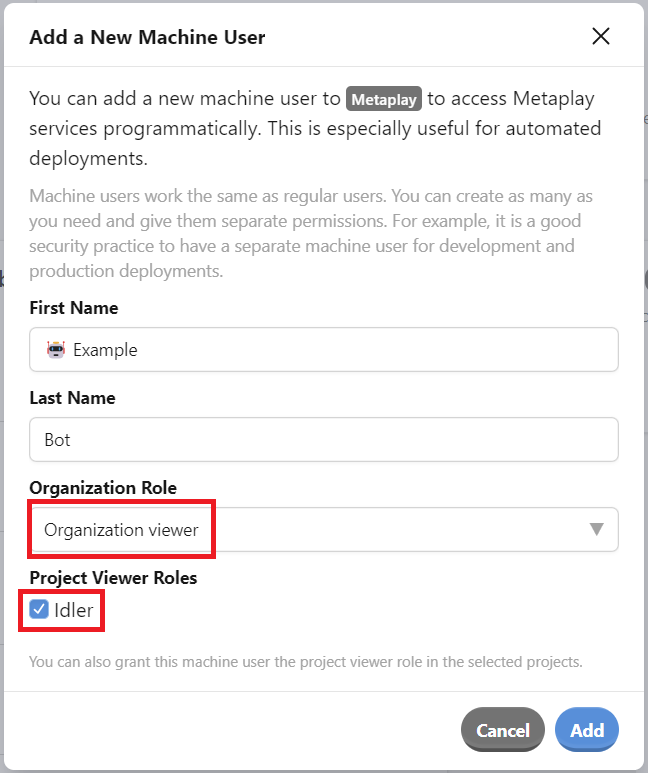
Navigate to the Members tab of your organization in developer portal. Then, press 'Add Machine User'.

Give the machine user a name of your choice, give it the 'Organization viewer' role, and check the project boxes for which you want to use this machine account.
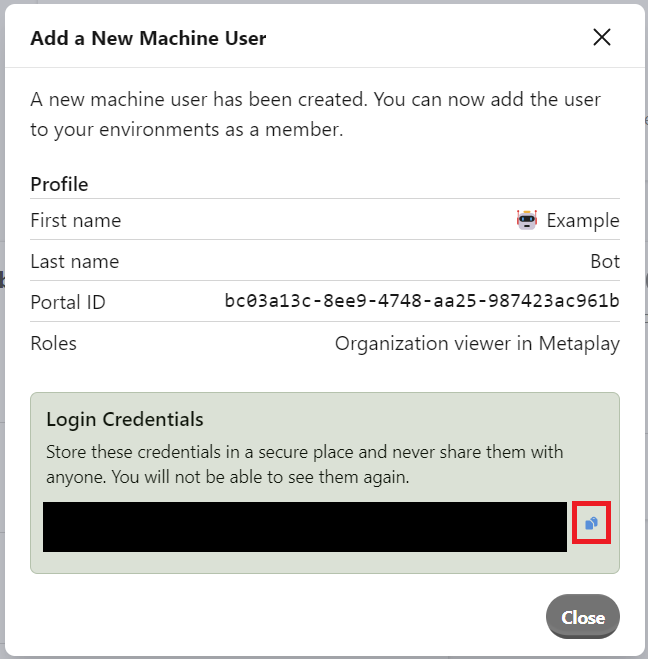
Copy the credentials into a safe place. We don't keep them, so you'll need to create another machine user if you lose them.
Navigate to the members of the desired environment in your project to which you wish to grant the machine user access. Then, repeat this for all relevant environments.

Setup Your CI System
If you are using Github, follow the Github Actions-specific instructions below. Otherwise, follow the instructions for the other CI systems.
Deploying with GitHub Actions
For GitHub Actions, we provide pre-filled templates in the developer portal that you can adapt to your project. The templates are built with reusable workflows provided by Metaplay to keep your actions as simple as possible.
Create a secret in Github Actions called
METAPLAY_CREDENTIALS. Store the machine user credentials created in the prior steps in this secret. If you need to get more familiar with the secrets, check out Github's own guide for more instructions.Navigate to the environment in question in the developer portal. Under the 'Deploy' tab, you will find a pre-filled template for GitHub Actions to add to your repository.
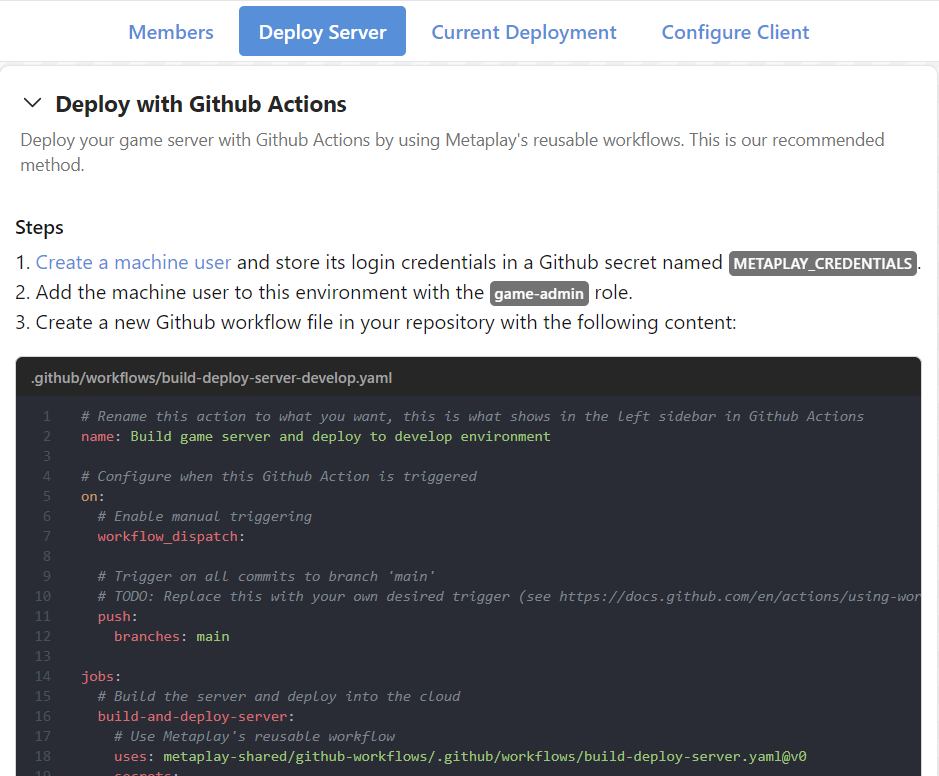
Customize the template for your needs by giving it a name of your choice and choosing when the CI job should trigger. Then, commit and push the workflow file into your repository. You should now see it under the "Actions" tab of your GitHub repository.
Deploying with Bitbucket Pipelines
For Bitbucket Pipelines, we provide pre-filled templates in the developer portal that you can adapt to your project.
Create a secret in Bitbucket Pipelines called
METAPLAY_CREDENTIALS. Store the machine user credentials created in the prior steps in this secret. If you need to get more familiar with the secrets, check out Bitbucket's own guide for more instructions.Navigate to the environment in question in the developer portal. Under the 'Deploy' tab, you will find a pre-filled template for Bitbucket Pipelines to add to your repository.
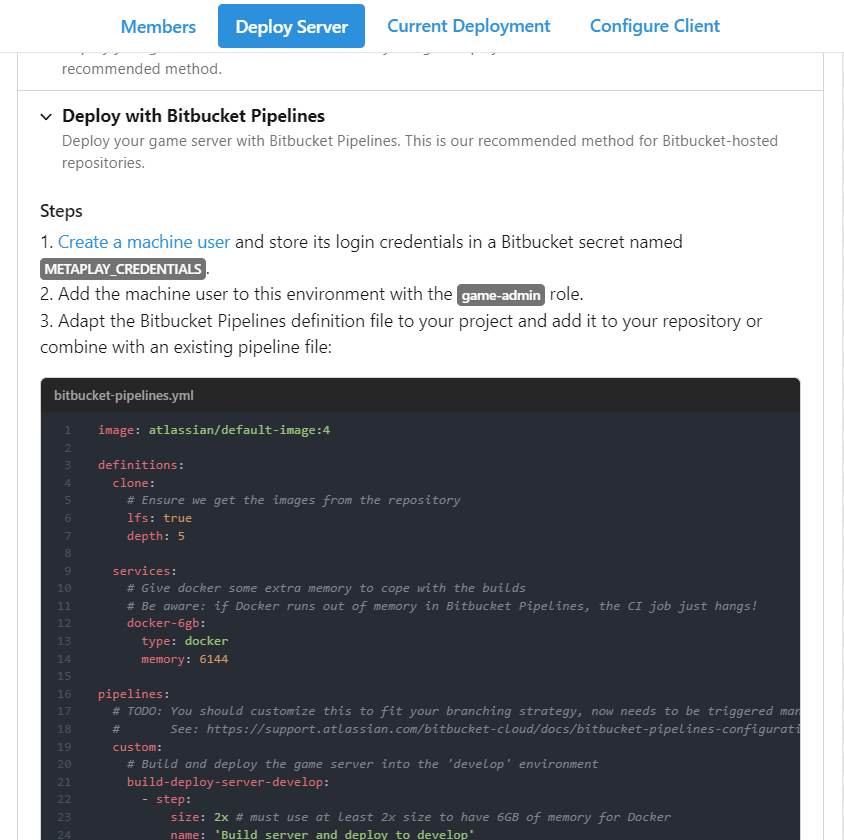
Customize the template for your needs by giving it a name of your choice and choosing when the CI job should trigger. Then, commit and push the workflow file into your repository. You should now see it under the "Pipelines" tab of your Bitbucket repository.
Deploying with Other CI Systems
For other CI systems, we provide a pre-filled shell script to use as a basis to set up your CI job.
First, create a secret in your CI system named
METAPLAY_CREDENTIALS. Store the machine user credentials created in the previous steps as the secret's valueNavigate to the chosen environment in the developer portal. Under the 'Deploy' tab, you will find a pre-filled shell script that you can use as a basis for setting up your CI job.
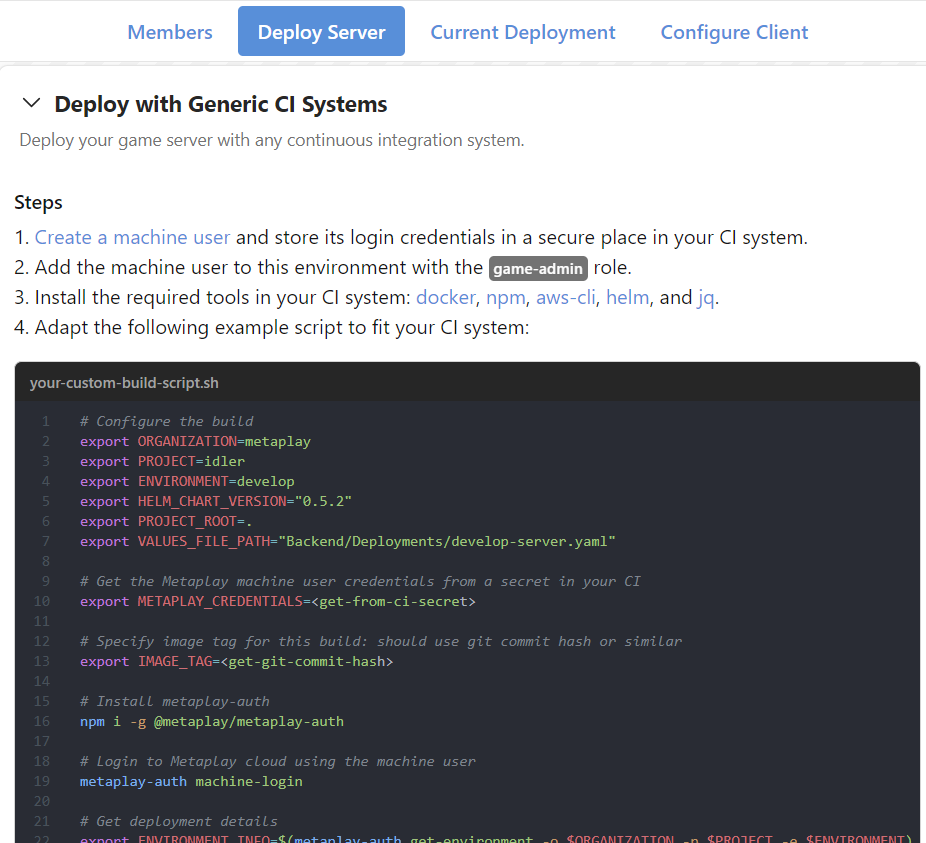
Create your own CI job configuration by adapting the pre-filled shell script from the previous step. You need to modify the script to:
- Pass in the
METAPLAY_CREDENTIALSsecret with the secret handling mechanism of your CI system - Configure the
IMAGE_TAGto be initialized to a git commit hash or a build number, or some other unique value for each build.
- Pass in the
WARNING
If you are using Bitbucket Pipelines, make sure you use a build machine with size: 2x at a minimum. The default-sized runner does not have enough memory to reliably run the docker builds, and this can cause the pipeline to hang indefinitely.
