Appearance
Getting Started with In-App Purchases
This page explains how to set up In-App Purchases in your game such that Metaplay is aware of them, enabling server-supported purchase validation.
Appearance
This page explains how to set up In-App Purchases in your game such that Metaplay is aware of them, enabling server-supported purchase validation.
This step-by-step guide shows how you can integrate basic In-App Purchases with Metaplay, enabling server-side purchase validation. There are three significant advantages to doing this through Metaplay:
For Google Play and (Apple) App Store, you'll need to install the Unity IAP service in your project and configure your In-App Purchases on the relevant platform-specific stores. See Unity's documentation for the latest guide on how to do this.
Starting with Unity IAP 4.2.0, you should also initialize Unity Gaming Services as described in Unity IAP's documentation.
Note that Unity's documentation also describes the runtime usage of UnityPurchasing, such as its initialization and the implementation of IStoreListener. These parts are managed by an IAPManager component in the Metaplay SDK, and you don't need to implement them yourself.
Unlike Google Play and App Store, Steam purchases do not use Unity IAP. Instead, you need to enable Steam player authentication as described in Implementing Steam Authentication. The IAPManager component in the Metaplay client SDK will use Steam IAPs when it detects that the Steamworks SDK has been initialized.
InAppProducts Config Sheet Let's create a new game config library (a new sheet in Google Sheets) for the Products. This allows us to define the contents of each Product, as well as the identifiers of the Product in the various in-app stores.
| ProductId #key | Name | Type | Price | NumGems | DevelopmentId | GoogleId | AppleId |
|---|---|---|---|---|---|---|---|
| GemPack1 | Gem Pack | Consumable | 0.99 | 50 | dev.gempack_1 | com.examplecompany.examplegame.gempack_1 | com.examplecompany.examplegame.GemPack_1 |
This example sheet defines a gem pack Product, identified within the game and the Metaplay SDK as GemPack1.
💡 Note
In the example above, only NumGems is game-specific! You can add any properties relevant to your game, such as item names or other kinds of currency. All of the other columns are built-in in the SDK but can be omitted if you won't need them. For example, if you're not publishing in the Apple store, there would be no need for an AppleId.
GoogleId and AppleId need to match the identifiers with which the Product is configured in the Google Play and App Store platforms, respectively. DevelopmentId is used for fake purchases during development - it does not involve any real IAP store, and its value could be anything suitable for internal testing.
Price is a reference price (in USD) that will be displayed in the LiveOps Dashboard. Its value does not affect the purchases in the game itself (which gets the price from the IAP store instead) but should be configured to roughly match the real price.
Type can be Consumable, NonConsumable, or Subscription. It should match the product's type in the IAP store.
If you're using Steam IAPs, there are a few additional columns you need to define. See Configuring Steam Purchases.
For the sake of simplicity and readability, in this guide, we're using hard-coded values in the InAppProducts config sheet. The Metaplay SDK has abstract classes called MetaRewards that allow for more sophisticated behavior (such as dynamic-content products) and integrate more seamlessly with the LiveOps Dashboard, allowing for accessing and searching through all rewards in the dashboard. Using the MetaRewards also helps divorce the rewards system from the rest of the game logic implementation and makes it more manageable and modular, especially for games with larger and more complex reward loops. Check out Implementing MetaRewards for more information.
To support the custom NumGems field in the config, define a custom subclass of InAppProductInfoBase:
[MetaSerializableDerived(1)]
public class InAppProductInfo : InAppProductInfoBase
{
    [MetaMember(1)] public int NumGems;
}
And define an InAppProducts library in your SharedGameConfig:
public class SharedGameConfig : SharedGameConfigBase
{
    [GameConfigEntry("InAppProducts")]
    public GameConfigLibrary<InAppProductId, InAppProductInfo> InAppProducts { get; private set; }
}InAppProducts If you haven't specified a custom class derived from GameConfigBuild, the SDK will build all libraries listed in your SharedGameConfig automatically, so you don't need to explicitly introduce InAppProducts to the builder. By simply running the config build, you'll produce a new config archive that includes the InAppProducts library built from the sheet.
If you have a custom class derived from GameConfigBuild, consider if you need to update it to include the InAppProducts library.
The SDK calls PlayerModel.OnClaimedInAppProduct after a purchase has been validated. Consequently, it is necessary to implement this method in your PlayerModel class:
public override void OnClaimedInAppProduct(
    InAppPurchaseEvent purchaseEvent,
    InAppProductInfoBase productInfoBase,
    out ResolvedPurchaseContentBase resolvedContent)
{
    InAppProductInfo productInfo = (InAppProductInfo)productInfoBase;
    // Add the contents of the product to the PlayerModel.
    NumGems += productInfo.NumGems;

    // We can ignore this for now.
    resolvedContent = null;
}IAPManager The client-side IAPManager component manages the initialization of the IAP store and the flow of purchases on the client. Enable it by setting MetaplayClientOptions.IAPOptions.EnableIAPManager to true:
// In the code where you initialize the MetaplayClient...
MetaplayClient.Initialize(new MetaplayClientOptions
{
    ...

    // ... add this:
    IAPOptions = new MetaplayIAPOptions
    {
        EnableIAPManager = true,
    },

    ...
});
If you now run the client, you should see the following info-level lines in the Unity log:
// Logged when MetaplayClient is initialized:
[iapManager] Created IAP manager (using Unity IAP)

...

// Logged after the session has started and the store has been initialized:
[iapManager] Store initialized with 1 product, 1 of them available
Or, if using Steam purchases:
// Logged when MetaplayClient is initialized:
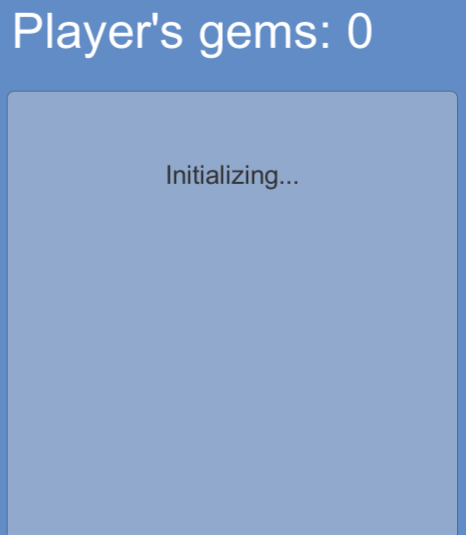
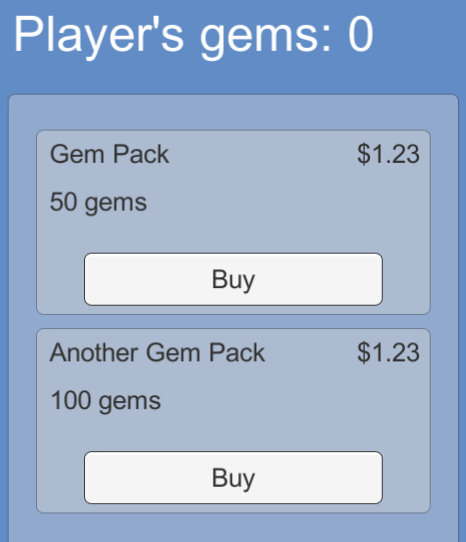
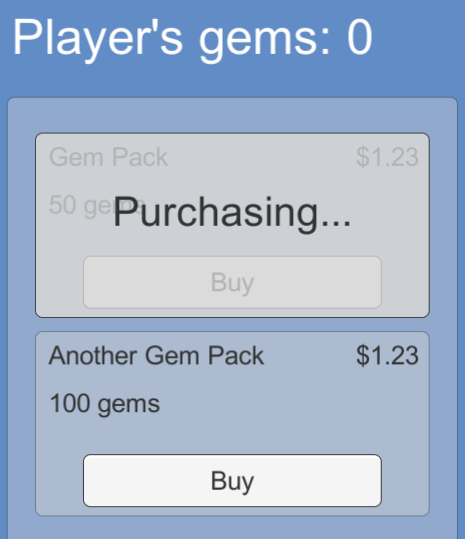
[iapManager] Created IAP manager (using server-driven purchase platform Steam)The following example snippets implement a simple shop UI that lists all the available Products. Each Product displays some information and has a purchasing button. ShopScript implements the instantiation of a prefab for each product, and ShopProductScript manages the UI for a single product.
The following pictures illustrate the functionality of the example shop UI:


// ShopScript class (MonoBehaviour)

// Object references:
// List where the product objects are spawned.
public Transform ItemList;
// Prefab for a single product in the shop UI.
public ShopProductScript ShopProductPrefab;
// Text showing the shop initialization status.
public Text InitializingText;

bool _shopUIIsInitialized = false;

void Start()
{
    InitializingText.text = "Initializing...";
}

void Update()
{
    TryInitializeShop();
}

void TryInitializeShopUI()
{
    // Only initialize the UI once.
    if (_shopUIIsInitialized)
        return;

    // Wait for store to initialize, or the initialization to fail.

    if (MetaplayClient.IAPManager.StoreIsAvailable)
    {
        // Store has been successfully initialized.

        _shopUIIsInitialized = true;
        InitializingText.gameObject.SetActive(false);

        // Get all configured products that are available in the store.
        IEnumerable<InAppProductInfo> products =
            MetaplayClient.PlayerModel
            .GameConfig.InAppProducts.Values
            .Where(productInfo =>
                MetaplayClient.IAPManager.StoreProductIsAvailable(productInfo.ProductId));

        // Create a ShopProductScript-equipped gameObject for
        // each of the available products.
        foreach (InAppProductInfo productInfo in products)
        {
            ShopProductScript productObject = Instantiate(ShopProductPrefab, ItemList);
            productObject.ProductId = productInfo.ProductId;
        }
    }
    else if (MetaplayClient.IAPManager.StoreInitFailure.HasValue)
    {
        // Store initialization failed.
        // Display failure info.
        _shopUIIsInitialized = true;
        InitializingText.text = $"Shop initialization failed: {MetaplayClient.IAPManager.StoreInitFailure.Value.Reason}";
    }
}// ShopProductScript class (MonoBehaviour)
// Parameter assigned when instantiated (by ShopScript).
public InAppProductId ProductId;
// Object references:
// Texts for showing info about the product.
public Text NameText;
public Text PriceText;
public Text RewardText;
// An indicator (e.g., a spinner) shown when
// a purchase flow of this product is ongoing.
public GameObject PurchasingIndicator;
public void Start()
{
// Initialize UI for this product
IAPManager.StoreProductInfo? storeProductMaybe = MetaplayClient.IAPManager.TryGetStoreProductInfo(ProductId);
if (storeProductMaybe.HasValue)
{
IAPManager.StoreProductInfo storeProduct = storeProductMaybe.Value;
InAppProductInfo productInfo = MetaplayClient.PlayerModel.GameConfig.InAppProducts[ProductId];
// Price text comes from Unity IAP.
PriceText.text = storeProduct.Product.metadata.localizedPriceString;
// Note: using non-localized text just for simplicity in this example.
NameText.text = productInfo.Name;
RewardText.text = $"{productInfo.NumGems} gems";
}
}
public void Update()
{
// Show or hide purchasing indicator based on whether this
// product is currently being purchased.
PurchasingIndicator.SetActive(IsPurchasing());
}
public void OnClickBuy()
{
// Don't try to buy the product if its purchase is already ongoing.
if (IsPurchasing())
return;
// Start a purchase flow of the product.
// This will initiate a purchase in the IAP store, and if successful,
// the purchase will be validated by the server. Ultimately,
// PlayerModel.OnClaimedInAppProduct will be called.
MetaplayClient.IAPManager.TryBeginPurchaseProduct(ProductId);
}
bool IsPurchasing()
{
// Query the purchase flow status from the IAPFlowTracker helper.
// IAPFlowTracker listens to events from IAPManager and keeps
// track (in a best-effort manner) of ongoing purchases.
return MetaplayClient.IAPFlowTracker.PurchaseFlowIsOngoing(ProductId);
}🛒 Note
In this example, OnClickBuy directly calls IAPManager.TryBeginPurchaseProduct. If you're using the Idler sample project as a reference, you may notice that there ShopStaticItemScript.OnClickBuy instead invokes action PlayerPreparePurchaseContext. Either way is viable, depending on whether custom analytics information is needed for the purchase. See Custom Analytics Context for more information.
Once you have the client shop UI implemented, you can test the purchases in the Unity Editor connected to a development server (such as a local server). Clicking on a Product's purchase button should start a purchase flow (with debug messages in both the client and server logs) and eventually result in the player's NumGems being increased.
✅ Note
When used in the editor, Unity IAP does not interface with a real store such as Google Play or App Store, but instead produces fake purchase events for testing. Development servers accept both fake and real purchases. Staging and production servers only accept real purchases. See section 9. Configure the Servers for Real Purchase Validation for how to configure the server to validate real purchases.
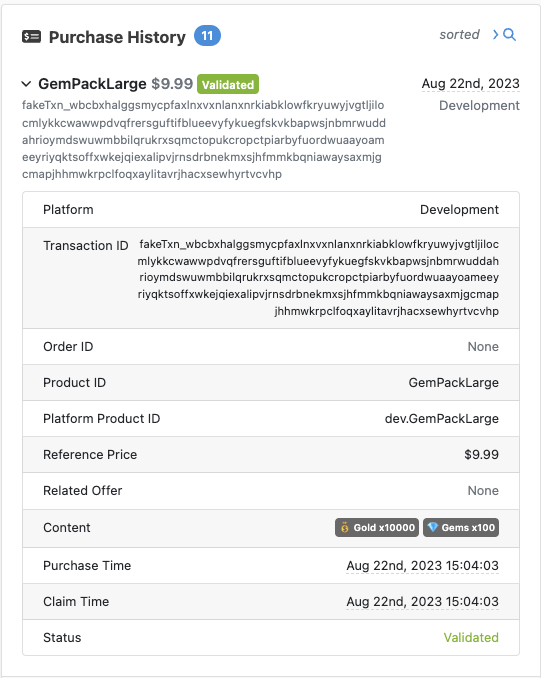
A player's purchases can also be seen in the LiveOps Dashboard. You should be able to see your test purchase in the Purchase History card:

Update Backend/Server/Config/Options.base.yaml with your project's platform-specific identity to enable server-side validation of in-app purchases:
GooglePlayStore:
    # Google Play / Android configuration, needed to validate Google Play IAPs:
    # Application id on Android.
    AndroidPackageName: com.examplecompany.examplegame
    # Base64-encoded public key for the Google Play app.
    # Get this from the Google Play console.
    GooglePlayPublicKey: "MIIBI..."

AppleStore:
    # App Store / iOS configuration, needed to validate App Store IAPs:
    IosBundleId: com.examplecompany.examplegame

Steam:
    EnableSteam: true
    AppId: [Your Steam application ID]
    PublisherAuthenticationKeyPath: [The Steam publisher authentication key created in step 1]
For more information about the Steam options, see Implementing Steam Authentication.
If you want to use separate package names or bundle IDs for different environments, you can override the base values in the per-environment Options.<env>.yaml files.
⚠️ IAP Receipt Reuse
If AndroidPackageName or IosBundleId have not been set, the backend can only validate that the IAP receipts are valid by verifying an IAP with a certain product ID has been purchased. However, it cannot verify the product purchased belonged to your application. If you do not set the application IDs, a malicious actor could publish their own application with an IAP with the same product ID, purchase the item, and successfully use the receipt on your Game.
Once you have added this configuration, you can also use Google Play's and App Store's sandbox (test) purchases. See Sandbox Purchases for more information. Note that sandbox purchases are not the same as the fake purchases used when playing in Unity Editor.
For App Store, by default, real-money (non-sandbox) purchases are only accepted in production environments. If you need to use real-money App Store purchases also in your development or staging environments, you can set option AppleStore:AcceptProductionPurchases to true in the appropriate Options.<env>.yaml file.
Similarly, for Steam, real-money purchases are used in production, and sandbox purchases in other environments. To test real-money purchases also in your development or staging environments, you can set Steam:UseProductionPurchases to true in the appropriate Options.<env>.yaml file.
For an in-depth guide about implementing more advanced features such as dynamic-content purchases and recording the resolved content of purchases, check out Advanced Usage of In-App Purchases.