Appearance
Dynamic Scaling
This document describes how to automatically adjust the number of server nodes based on the backend's load.
Appearance
This document describes how to automatically adjust the number of server nodes based on the backend's load.
Load Balancing - This page continues the example on the Balancing Load Between Nodes page. Load Balancing is the process of placing an entity on a suitable node such that the load on a single node does not exceed a limit.
Understanding how entities are placed on server instances - Dynamic Scaling changes the number of nodes in node sets. The Configuring Cluster Topology page describes how these node sets are configured to become eligible to run certain entities.
Multiplayer entities - Dynamic Scaling is only supported for ephemeral multiplayer entities. See Introduction To Multiplayer Entities for information on how to implement a custom multiplayer entity.
The server load may change rapidly, and manually scaling up to meet the demand or scaling down to reduce costs is error-prone and laborious. Additionally, it requires server redeploys, causing downtime. The Metaplay backend can automatically scale up and down the server with no downtime, based on configurable metrics.
Dynamic Scaling Limitations
Dynamic Scaling is only supported for Ephemeral Entity types that use a ManualShardingStrategy.
Infrastructure Resource Limits
All scaling, dynamic or manually modifying node set sizes, is subject to the resource limits imposed by the underlying infrastructure. Exceeding the resource limits can result in failed server deploys and Kubernetes Pods stuck in Unschedulable state.
In this example, we'll continue from where we left off in the Balancing Load Between Nodes page and make the backend automatically scale nodes for the Battle entity based on the number of ongoing battles.
We start by Specifying a Custom Cluster Topology and adding a node set eligible for dynamic scaling.
# Environment name and family
environment: my-environment-name
environmentFamily: Development
...

# Enable the new Metaplay Kubernetes operator.
experimental:
  gameserversV0Api:
    enabled: true

shards:
  ...
  - name: dynamic-battle
    scaling: dynamic # enable dynamic scaling
    minNodeCount: 1 # always at least 1 node
    maxNodeCount: 3 # scale up to 3 nodes
With the dynamic node set created, we place the Battle entities on this node set. To do this, we'll edit the cloud server options file for the environment and add the node set name as an override.
Clustering:
  EntityPlacementOverrides:
    Battle: ["dynamic-battle"]
Entity Config
This same EntityPlacement can also be declared in the entity's EntityConfig declaration by setting NodeSetPlacement => new NodeSetPlacement("dynamic-battle").
The dynamic Scaling now automatically uses the the workload information we defined earlier in BattleWorkload. Next, we want to make the limits configurable. We do this by adding a new RuntimeOption, exposing it via BattleWorkload hooks, and then configuring the desired values.
We start with a new LoadbalancingOptions:
[RuntimeOptions("Loadbalancing", isStatic: true)]
public class LoadbalancingOptions : RuntimeOptionsBase
{
    public record struct BattleNodeSet(int NumBattlesSoftLimit, int NumBattlesHardLimit);
    public Dictionary<string, BattleNodeSet> NodeSets { get; private set; }

    public override async Task OnLoadedAsync()
    {
        // Validate the NodeSets match the nodesets given for Clustering
        ClusteringOptions clusteringOptions = await GetDependencyAsync<ClusteringOptions>(RuntimeOptionsRegistry.Instance);
        ShardingTopologySpec shardingSpec = clusteringOptions.ResolvedShardingTopology;

        // Filter out unknown nodesets. This allows defining all possible node sets in base config.
        NodeSets = NodeSets
            .Where(nodeset =>
            {
                if (!shardingSpec.NodeSetNameToEntityKinds.ContainsKey(nodeset.Key))
                    return false;
                return true;
            })
            .ToDictionary();

        // Fail to start if there are no configured for battle
        if (NodeSets.Count == 0)
            throw new InvalidOperationException($"No battle NodeSets defined for current current cluster config. Check NodeSets option.");
    }
}
And then we refer to these values in our BattleWorkload:
public class BattleWorkload : WorkloadBase
{
    [MetaMember(1)] public WorkloadCounter Battles;

    [MetaDeserializationConstructor]
    public BattleWorkload(WorkloadCounter battles)
    {
        Battles = battles;
    }

    public override bool IsWithinSoftLimit(NodeSetConfig nodeSetConfig, ClusterNodeAddress nodeAddress)
    {
        LoadbalancingOptions opts = RuntimeOptionsRegistry.Instance.GetCurrent<LoadbalancingOptions>();
        return Battles.Value >= opts.NodeSets[nodeSetConfig.ShardName].NumBattlesSoftLimit;
    }

    public override bool IsWithinHardLimit(NodeSetConfig nodeSetConfig, ClusterNodeAddress nodeAddress)
    {
        LoadbalancingOptions opts = RuntimeOptionsRegistry.Instance.GetCurrent<LoadbalancingOptions>();
        return Battles.Value >= opts.NodeSets[nodeSetConfig.ShardName].NumBattlesHardLimit;
    }

    public override bool IsEmpty()
    {
        // Eligible for shutdown?
        // Wait for every battle to complete which may take a lot of time
        return Battles.Value <= 0;
    }
Now, we can configure the limits conveniently in server options:
Loadbalancing:
  NodeSets:
    # For cloud deployments
    battle:
      NumBattlesSoftLimit: 50
      NumBattlesHardLimit: 80

    # For local server when we are running in singleton mode
    singleton:
      NumBattlesSoftLimit: 5
      NumBattlesHardLimit: 10
This example only used a single metric for auto scaling. A more complex scaling logic can be implemented by customizing IsWithinSoftLimit, IsWithinHardLimit, and IsEmpty.
Finally, with all the configuration, we enable the autoscaling. As autoscaling only works in cloud environments, we'll enable it our example development environment.
AutoScaling:
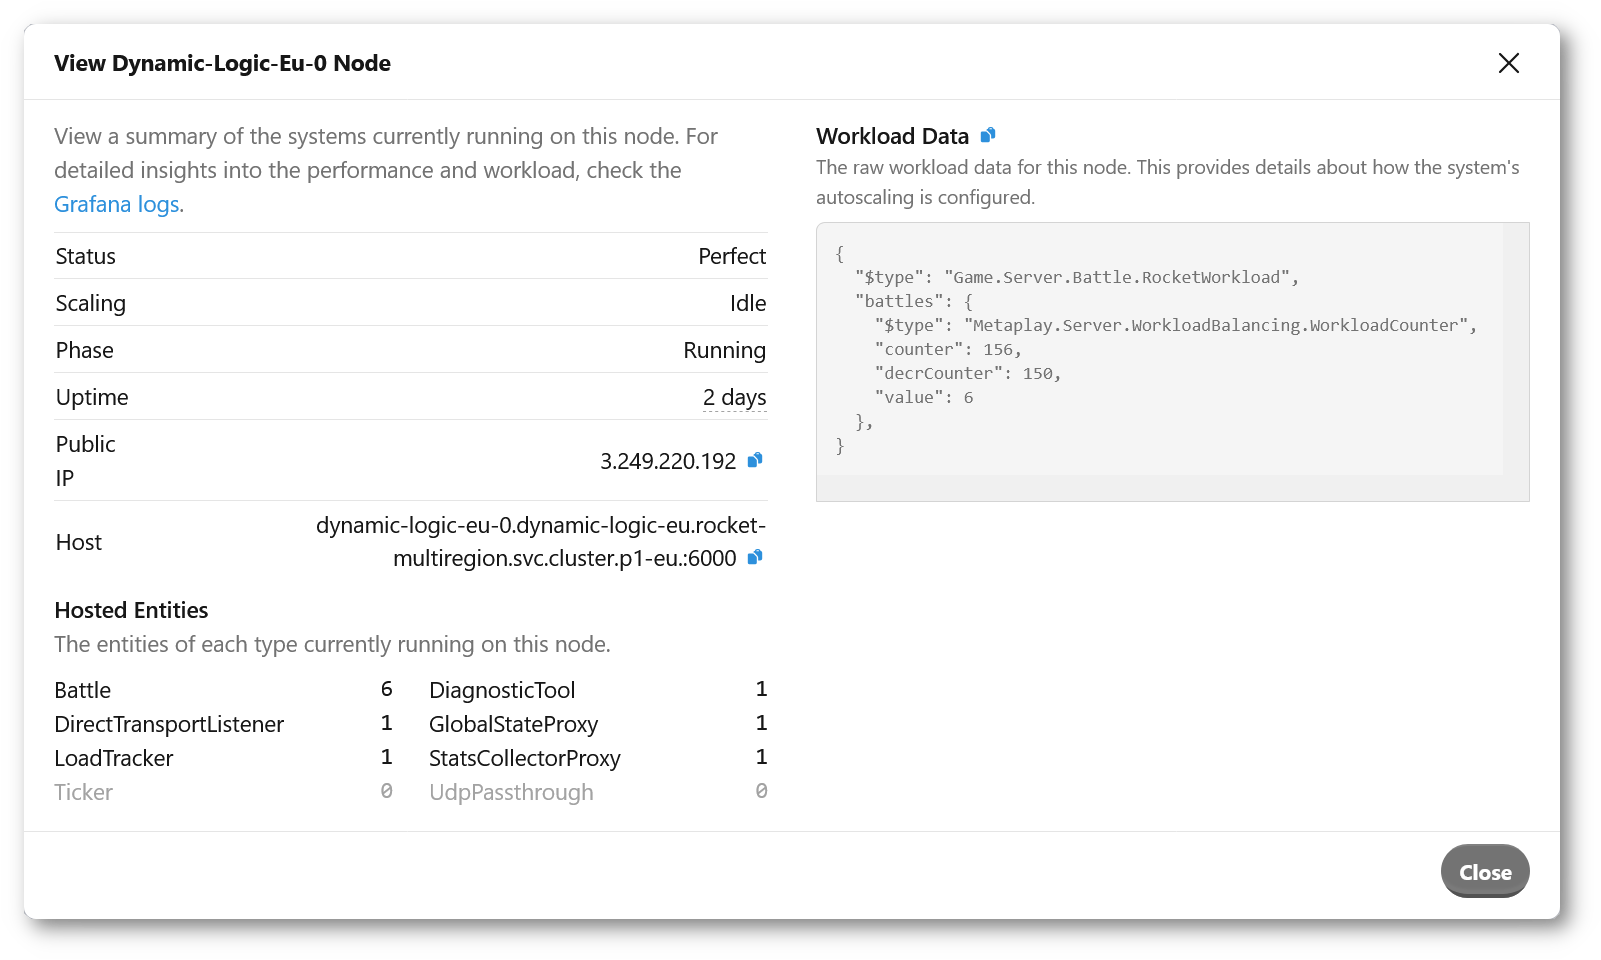
Enabled: trueTo inspect and debug Workload state on the backend, you may use the dashboard's environment page, where you can see each node's Workload contents and whether the node is being drained.

Each WorkloadCounter exposes its value via game_workload_inc_total{property=Name} and game_workload_dec_total{property=Name} metrics, and each gauge with game_workload_gauge{property=Name} metric.
To visualize the number of new Battles, we could for example plot:
sum(increase(game_workload_inc_total{namespace=~"$namespace", property="Battles"}[$__rate_interval])) by (pod)This would result in:
