
Appearance
Entity Export and Import
The LiveOps Dashboard can be used to export and import entities (such as players, guilds) to help during development and testing. This section gives an overview of the feature and how to customize it.
The LiveOps Dashboard can be used to export and import entities (such as players, guilds) to help during development and testing. This section gives an overview of the feature and how to customize it.
Heads up
At the end of the day, entity importing is an advanced development feature with lots of potential to cause unintended side effects and bugs. Handle with care!
You can export an entity (such as player or guild) from a game deployment using the LiveOps Dashboard. These exported entities may then be imported to another (compatible) game deployment. A common strategy is to export a player state from the production environment system into a staging environment for testing, or even to a local server for step-by-step debugging.
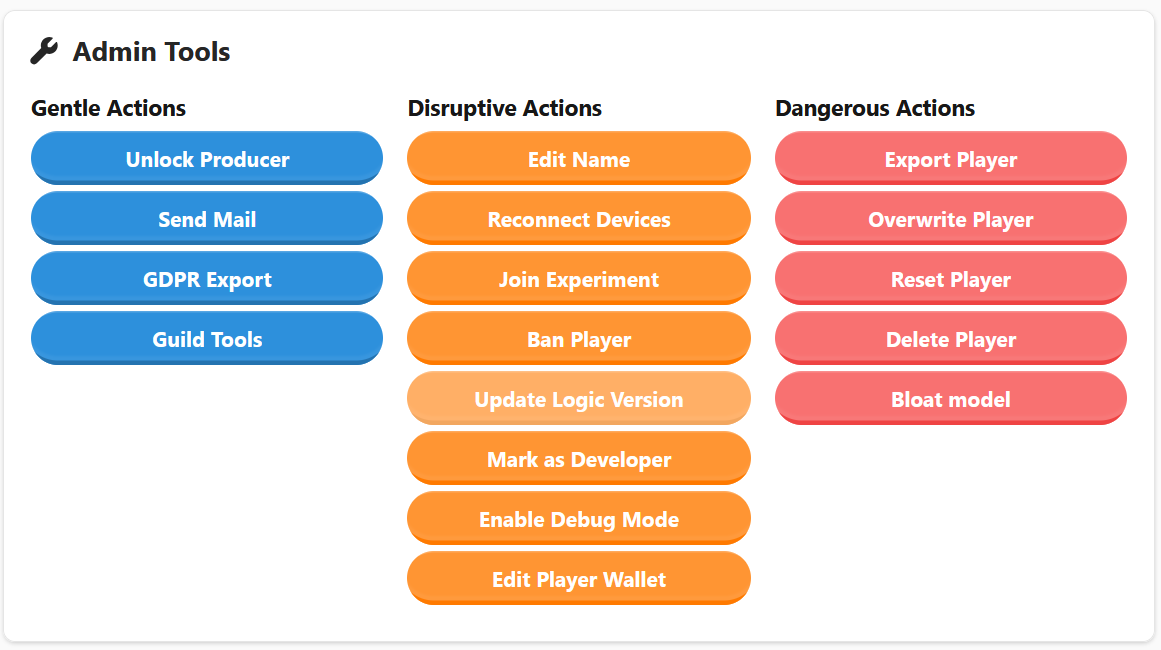
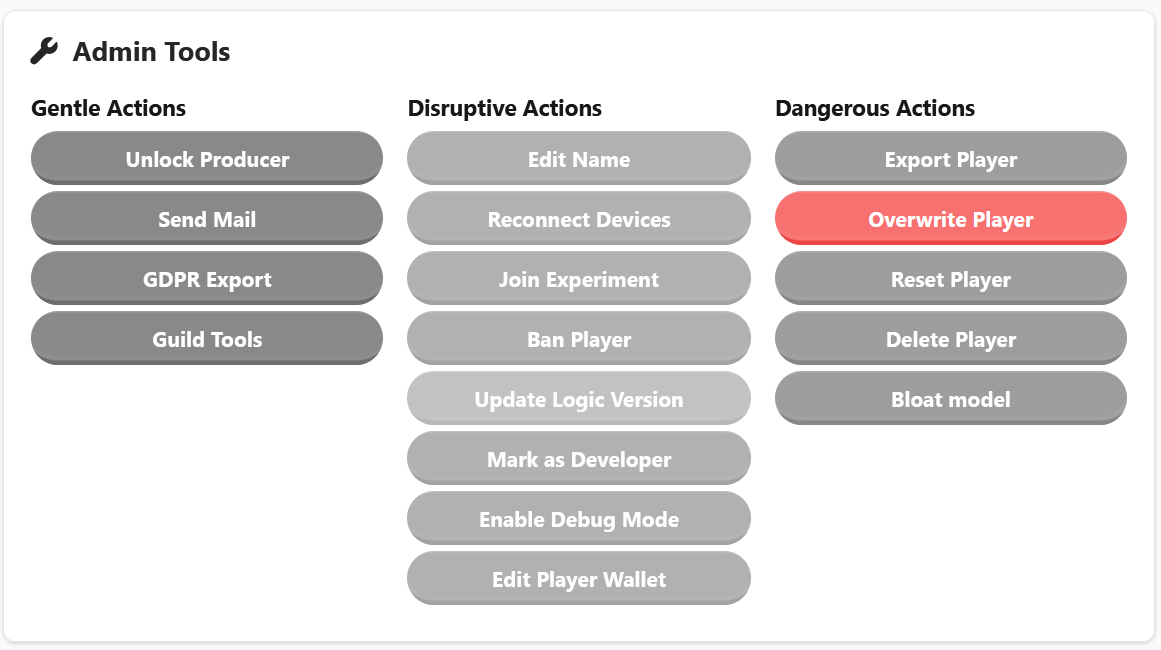
To export a player, open the LiveOps Dashboard for the source game deployment and navigate to the player you want to export. Click the Export Player button in the admin actions panel on the Dangerous Actions column to open the export modal.
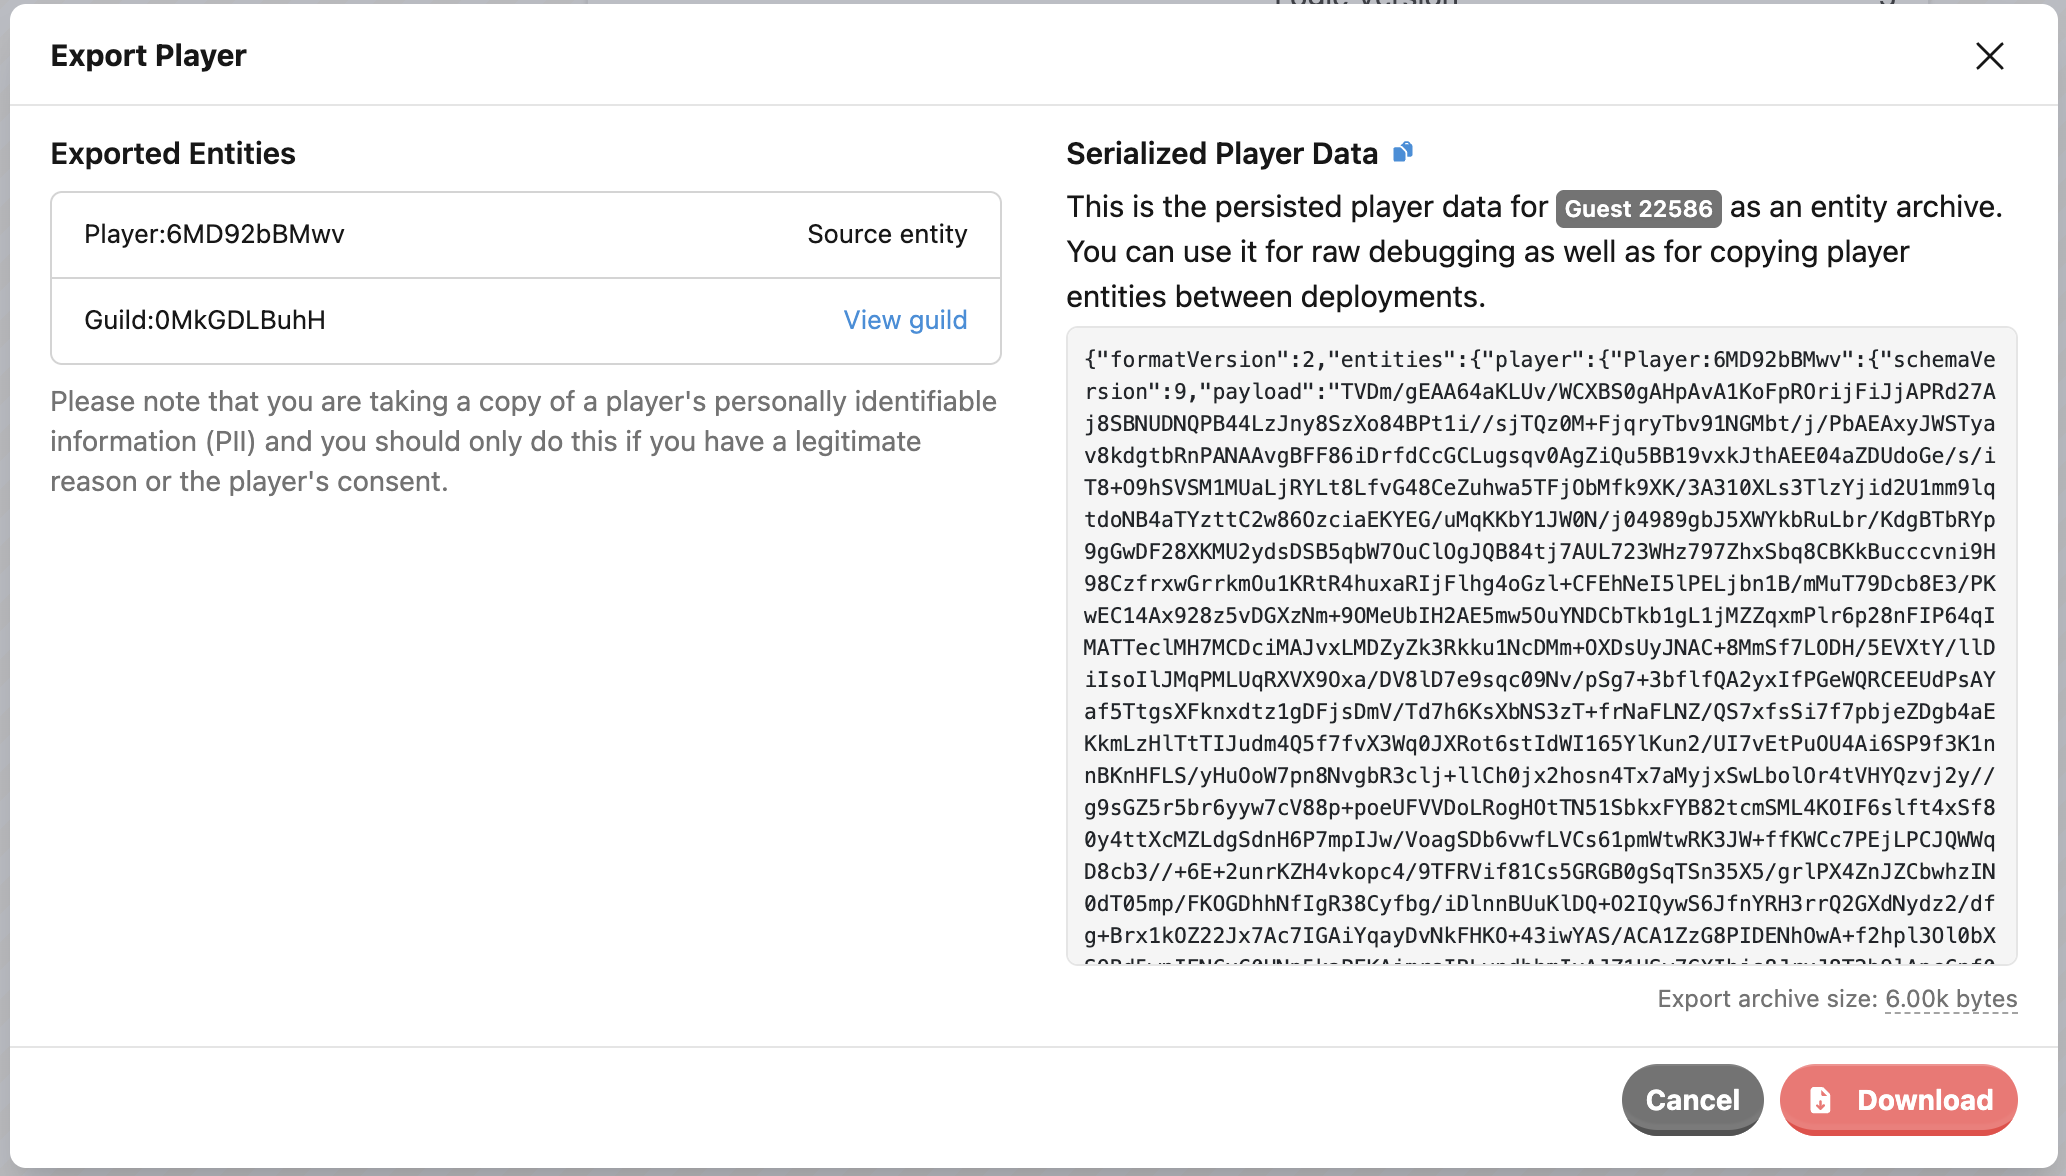
The popover shows a preview of the Entity Archive and a list of all the entities that will be included in the export. Click Download to save the data as a file, or click the copy icon next to Serialized Player Data to copy the raw data to your clipboard.
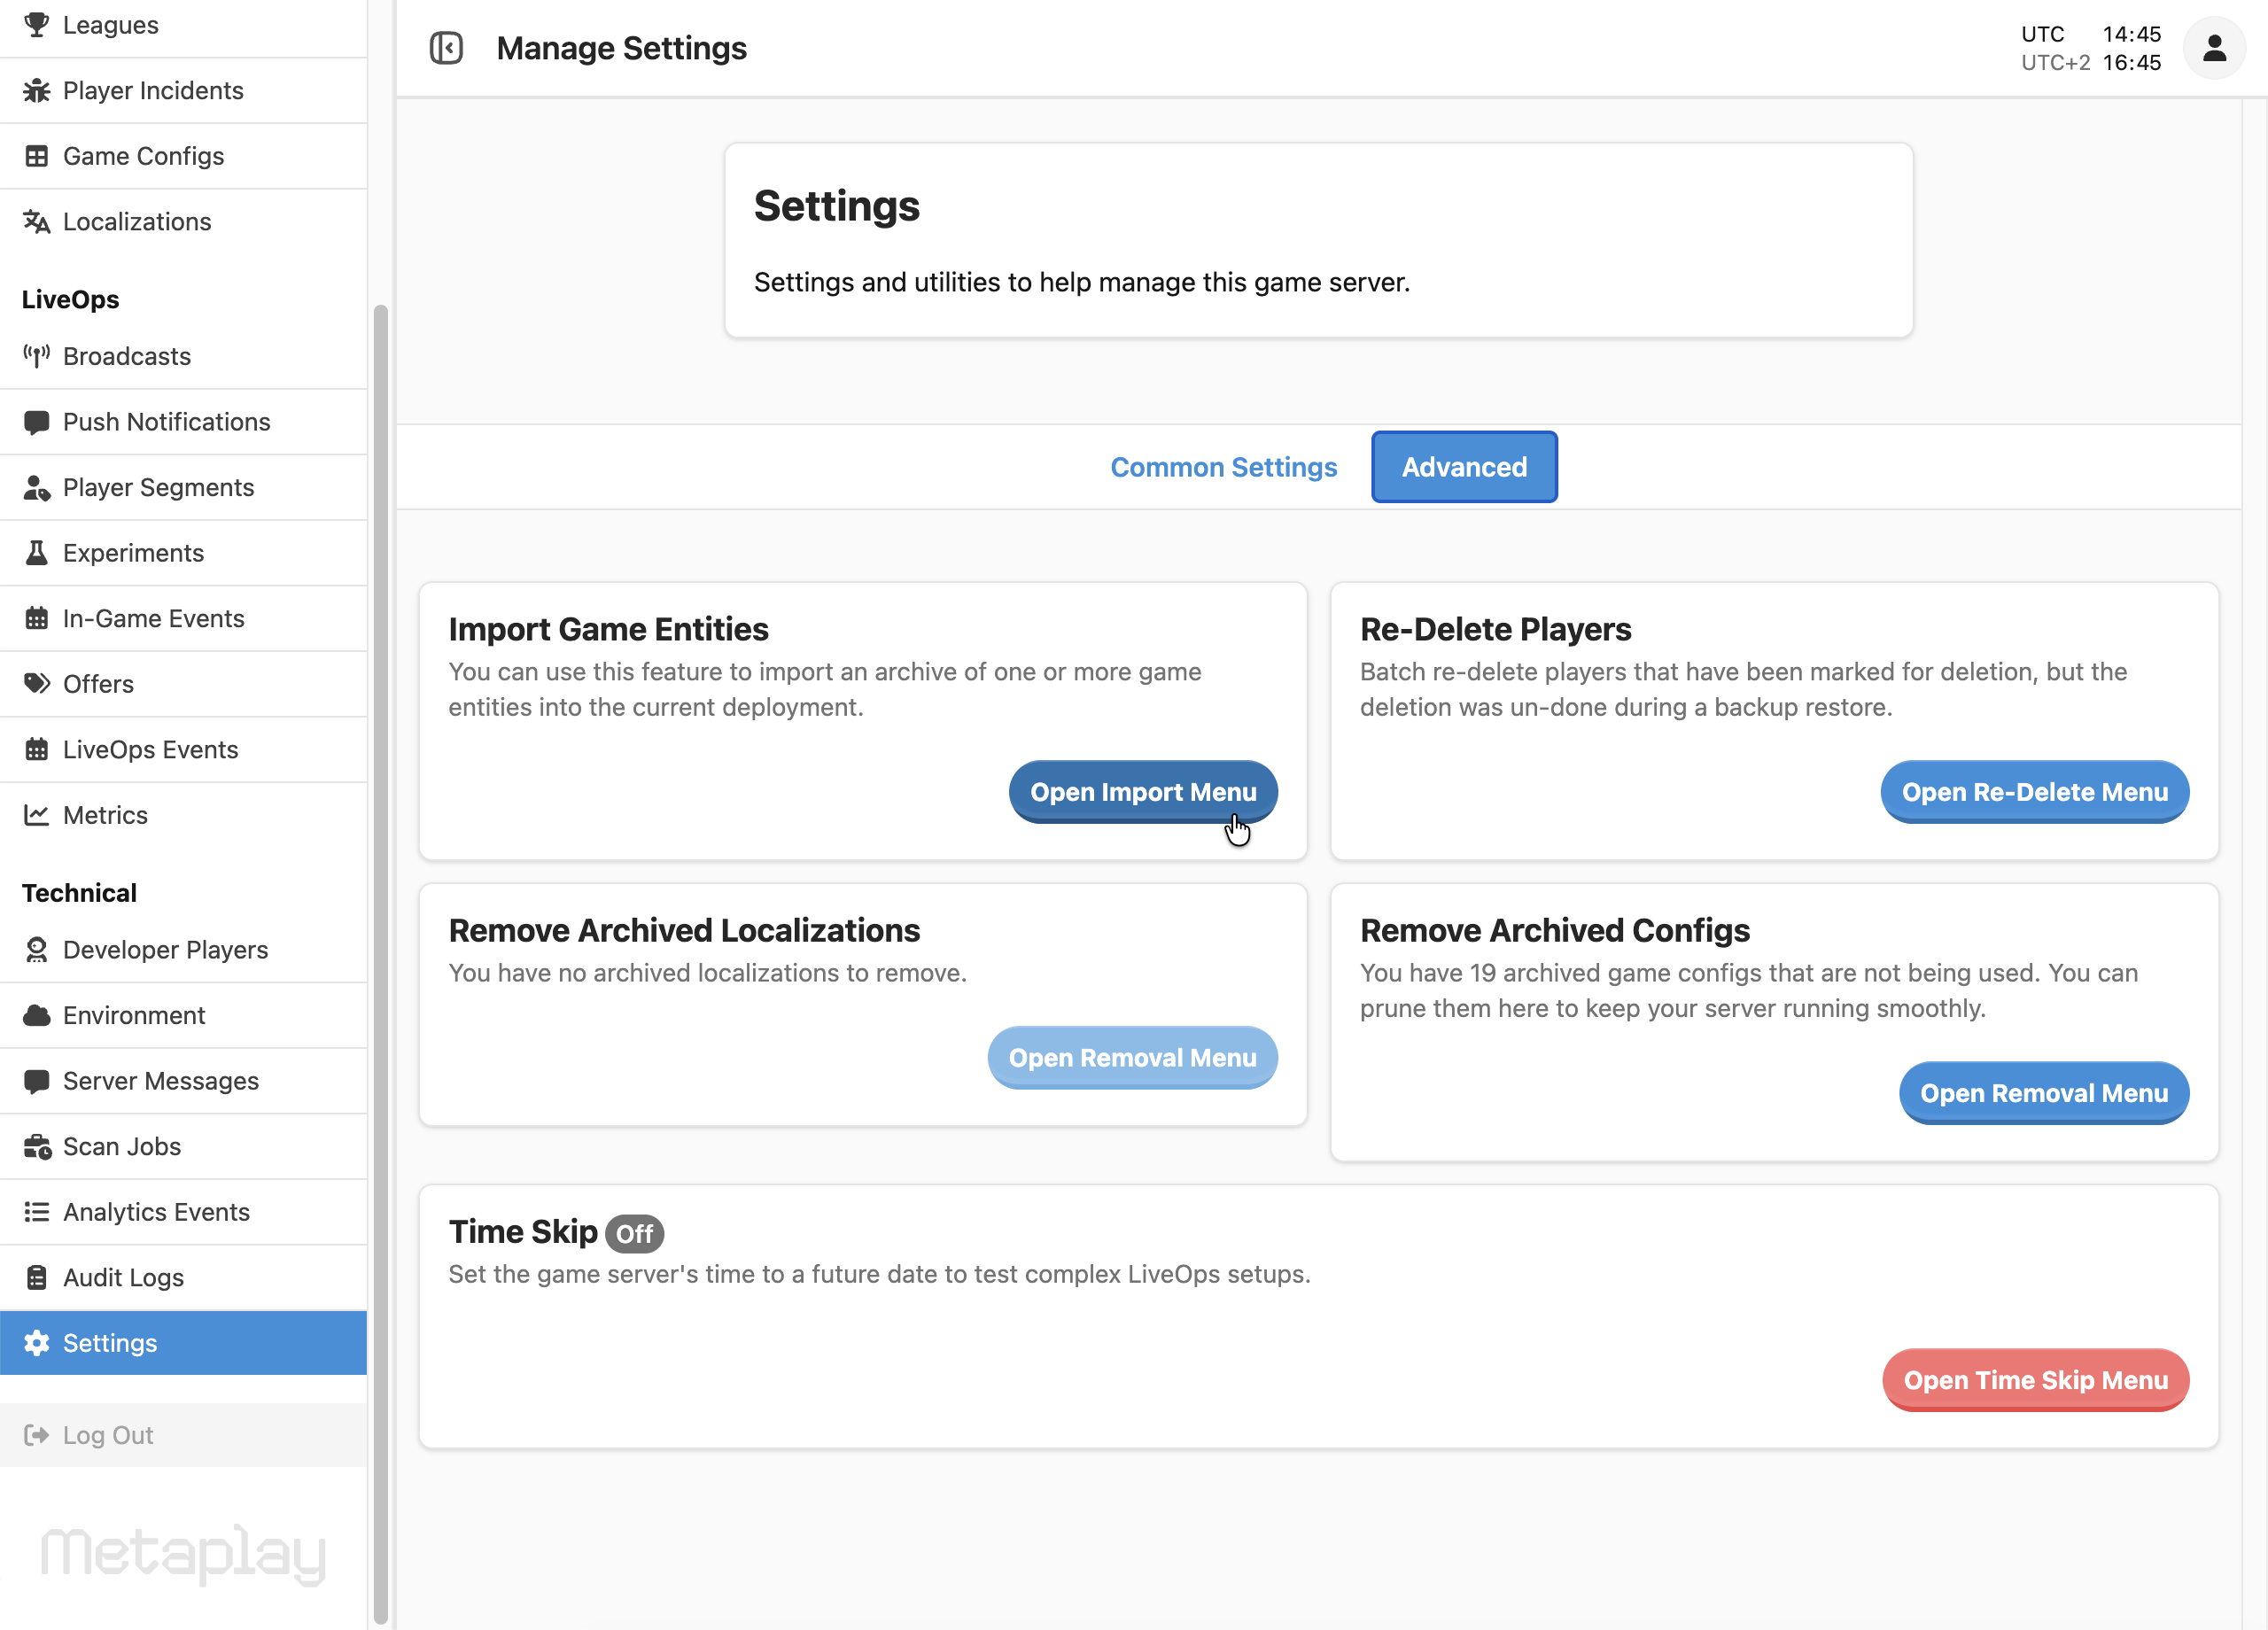
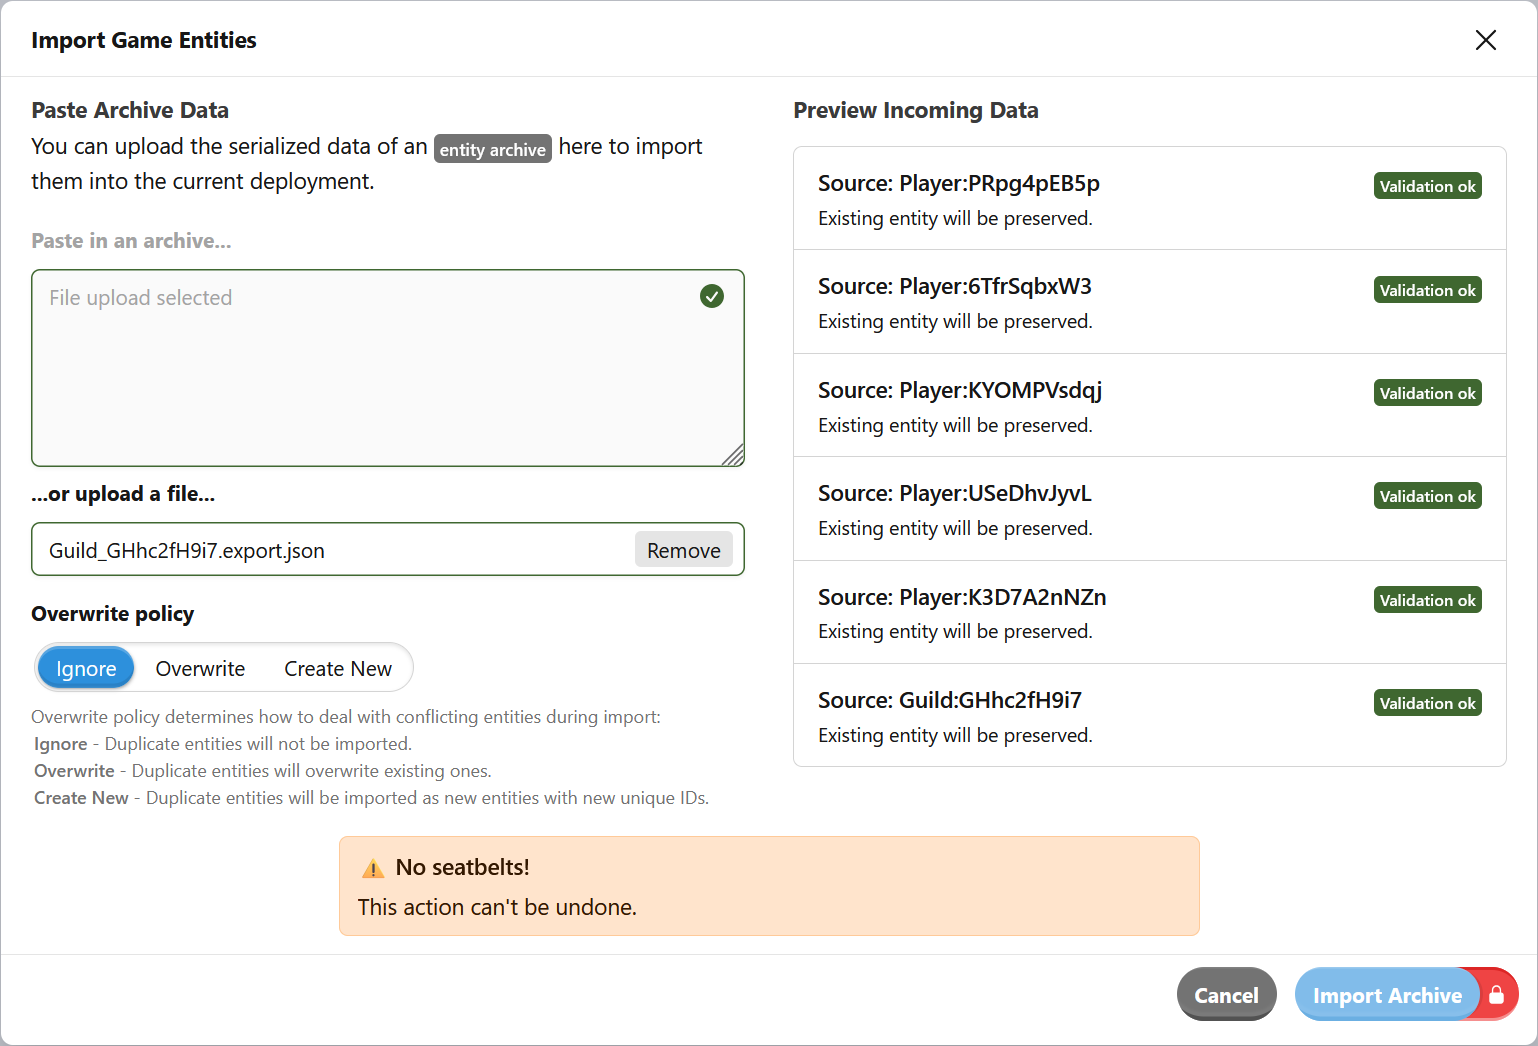
To import an entity, navigate to the LiveOps Dashboard for the target game deployment and select Settings → Advanced → Import Game Entities.
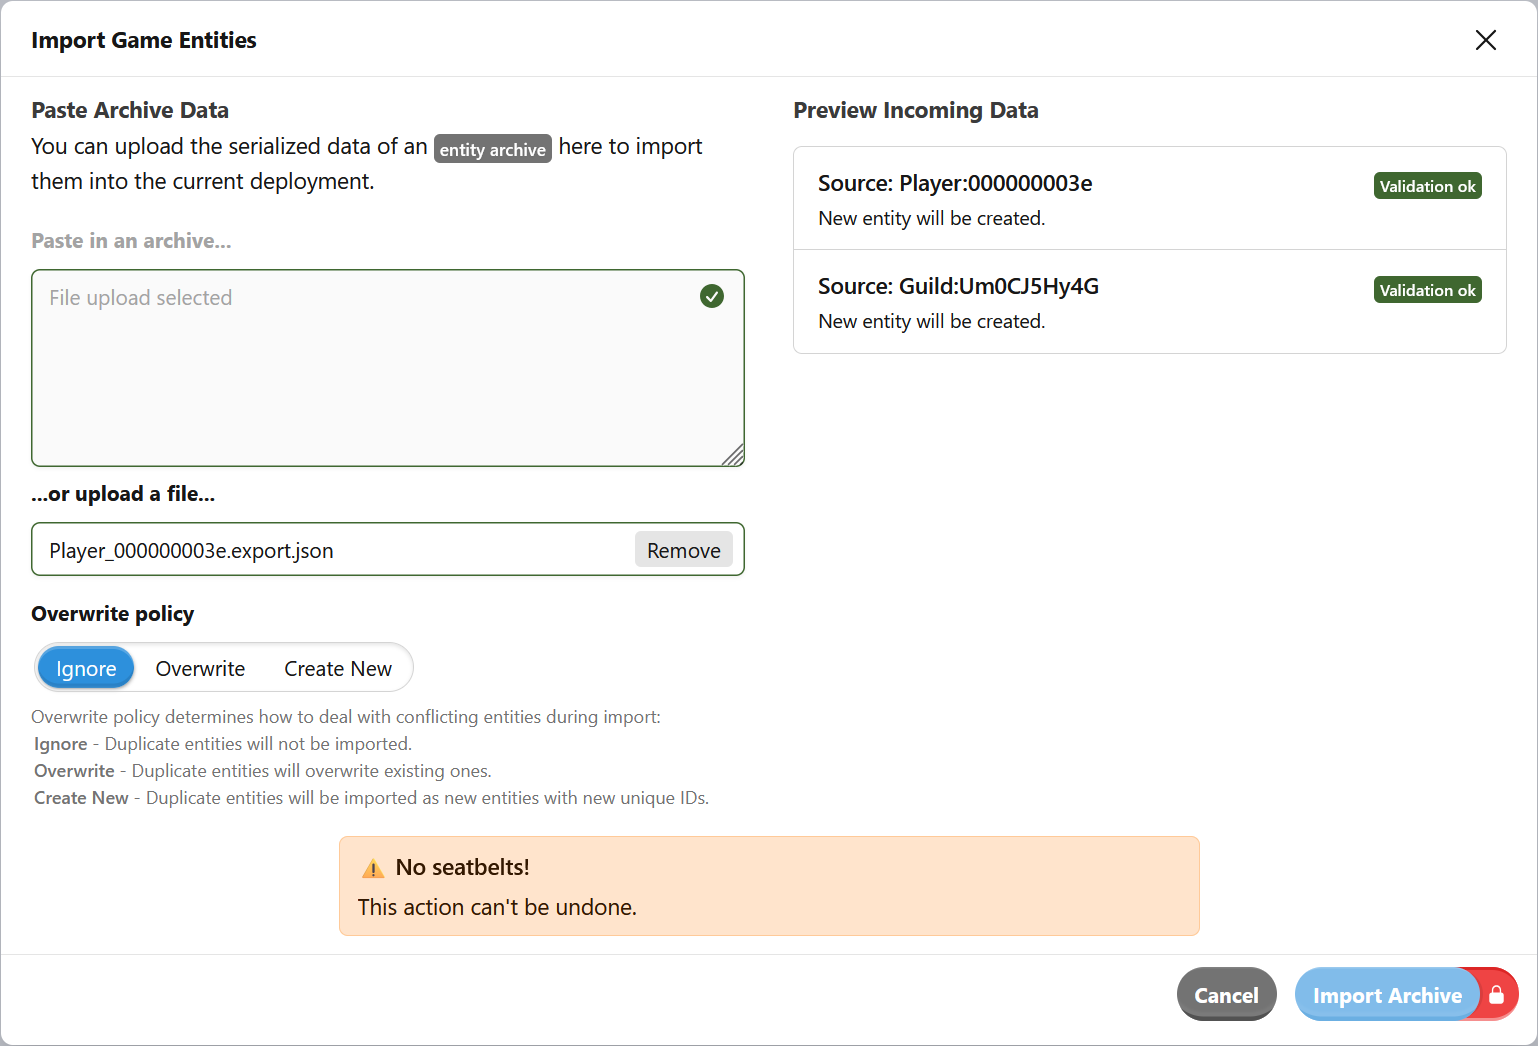
In the import modal, you can either drop in the Entity Archive file that you downloaded earlier - or paste in the raw data if you copied it as text. If the target environment has a conflicting entity (for example an existing player with the same player ID), you can choose to either skip importing that entity, overwrite the existing one or create a new entity with a new ID. The preview panel shows a list of all entities that will be imported and how potential conflicts will be handled.
Similar to players, you can export a guild from the LiveOps Dashboard. Navigate to the desired environment, select the guild, and choose Export Guild. This creates an Entity Archive that you can download as a file or copy to the raw text to your clipboard.
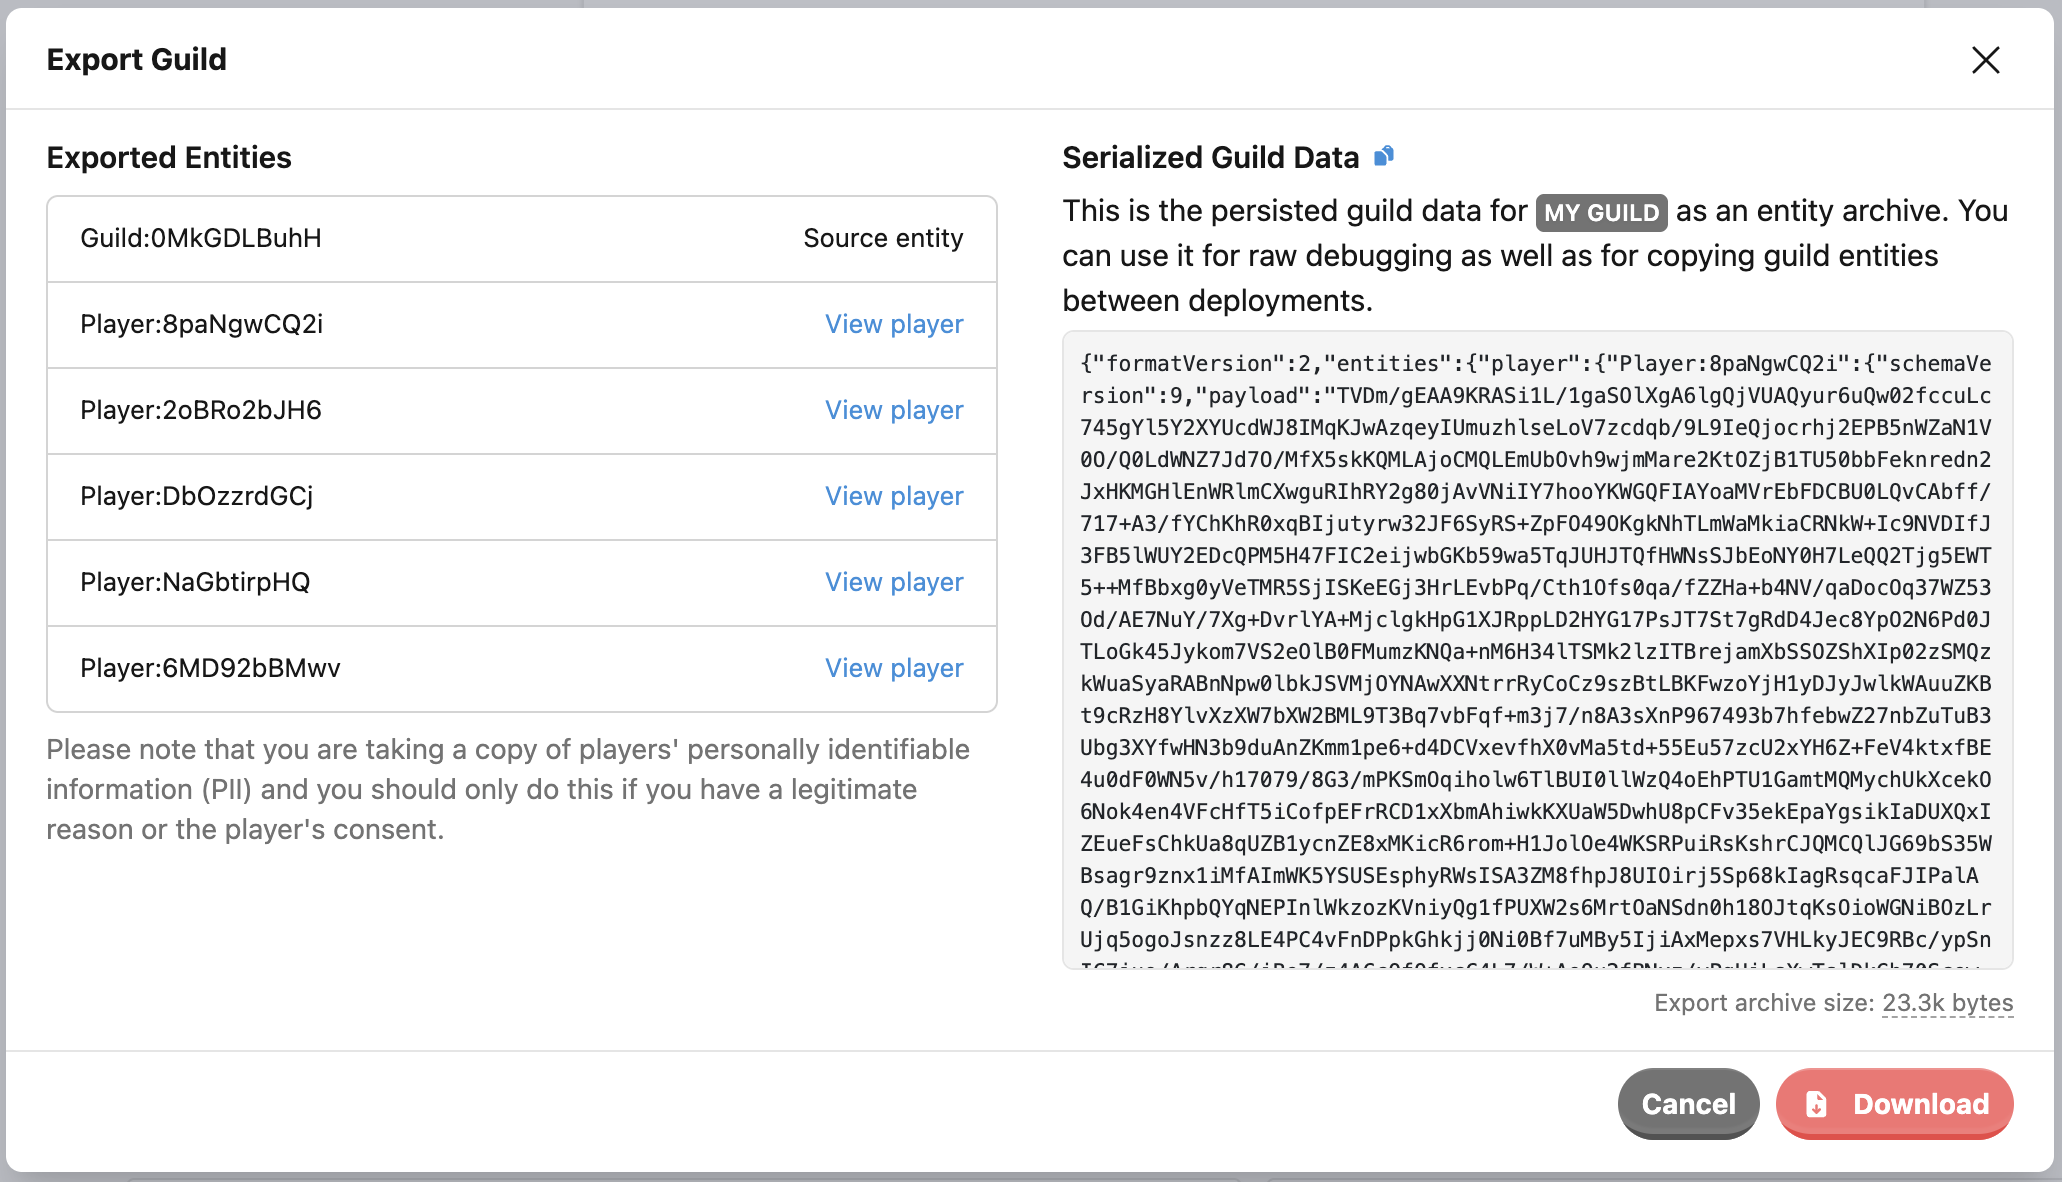
The exported Guild Entity Archive includes the guild and all of its member players. You can import this archive through the Import Game Entities menu to recreate the guild and its members in the selected target environment.
Overwriting an entity is a special type of import where you select an existing entity and replace it directly with imported data. This feature is especially useful for debugging and testing. Currently, the LiveOps Dashboard only supports overwriting player entities.
Many times, a good way to debug something is to overwrite your own player account with the game state from someone else. You can use the player overwriting feature to import a Serialized Player to essentially replace your player with the imported one and automatically remap your player ID and authentication methods on top of the imported data.
Pro tip
You could use player overwriting to quickly roll your account to a specific game state to repeatedly test a late-game feature or other complicated scenarios.
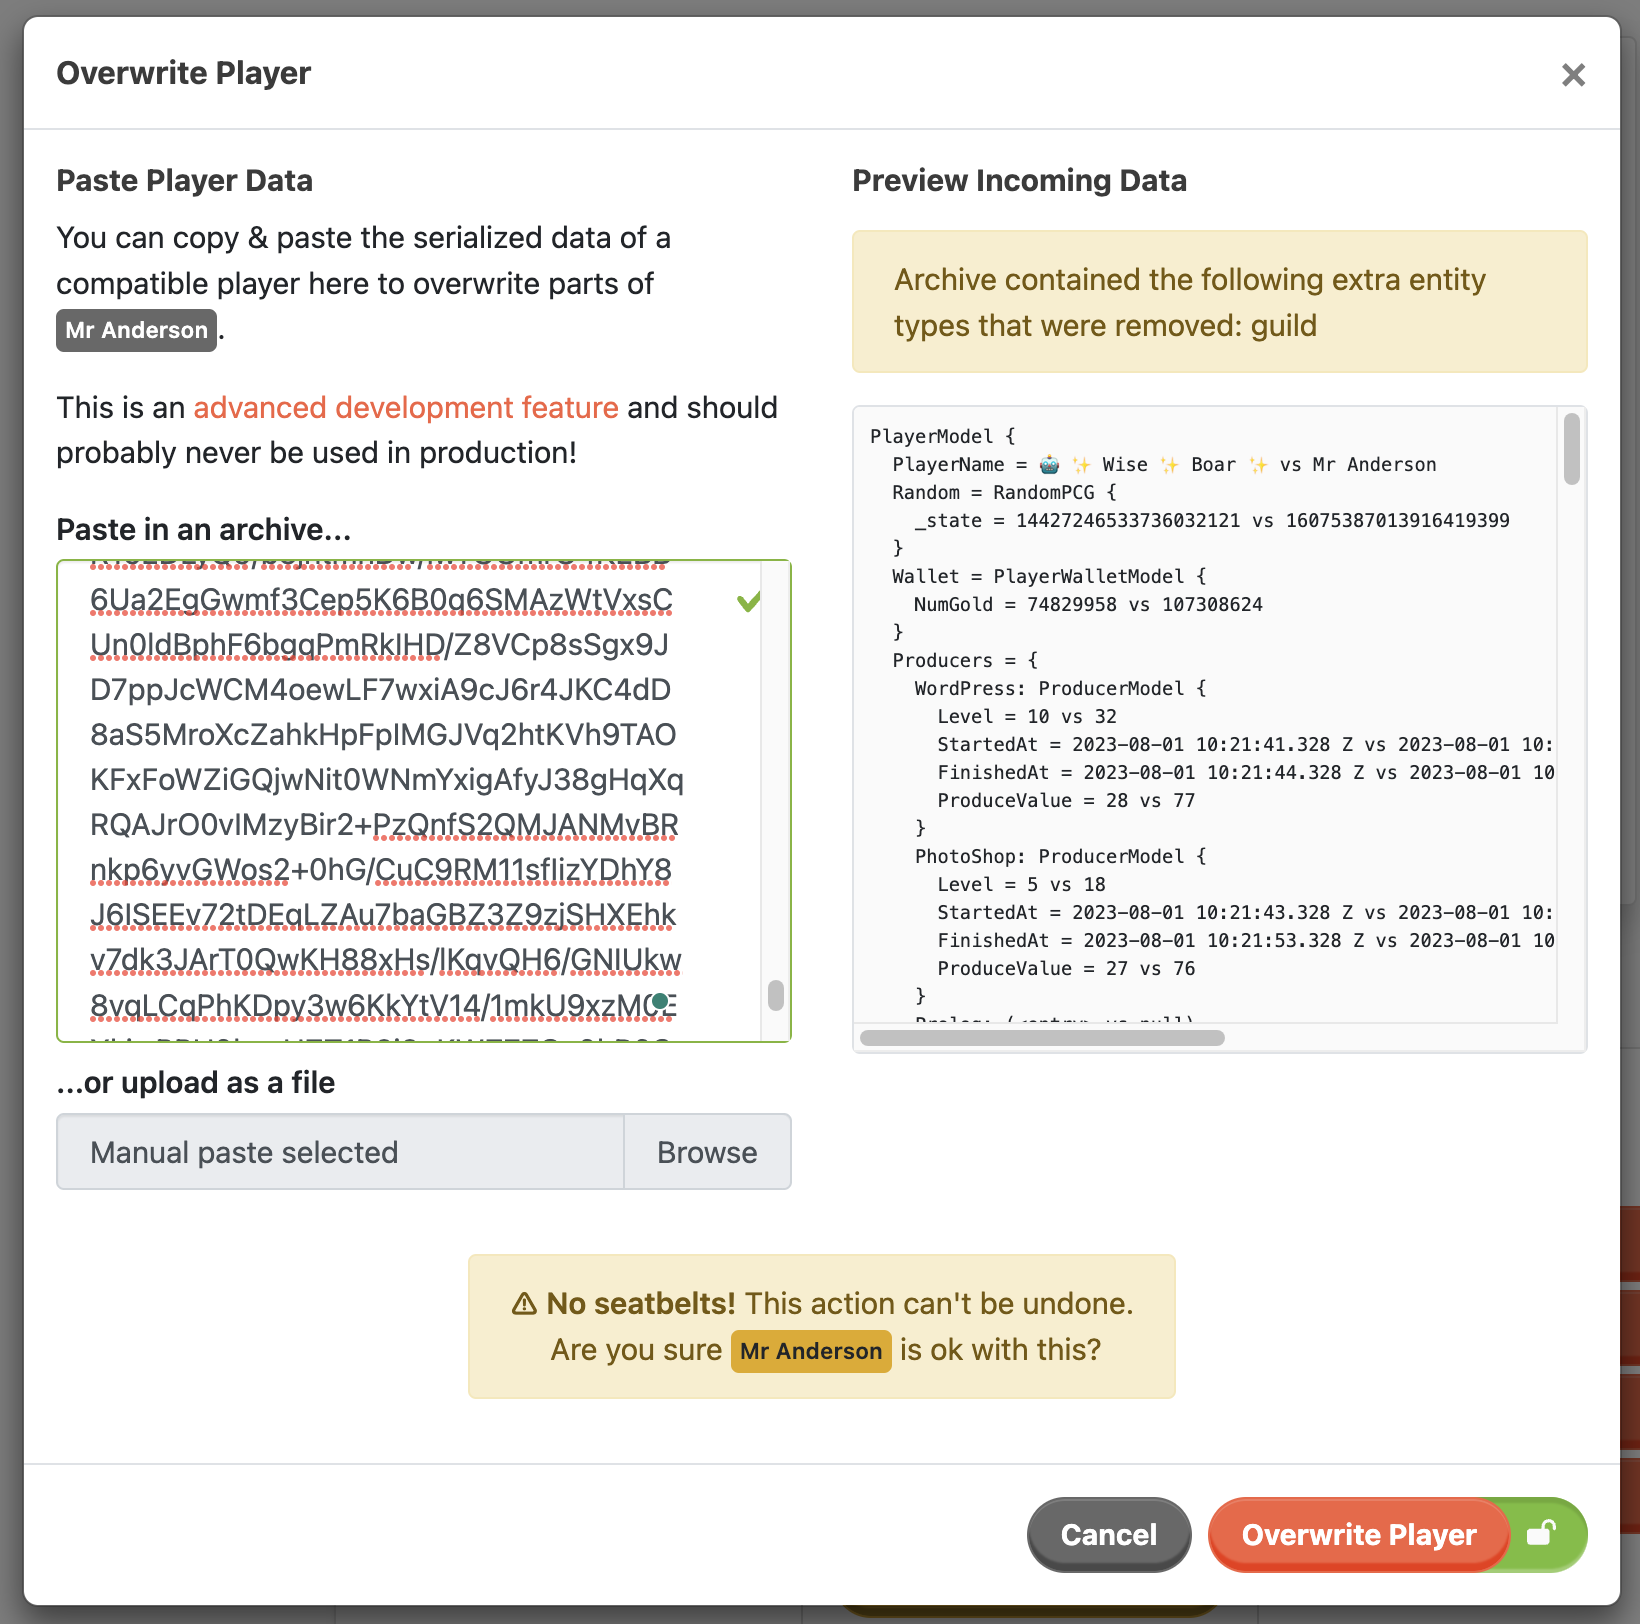
To overwrite a player, you can open them in the LiveOps Dashboard (usually an account you are connected to) and press the Overwrite Player button on the Dangerous Actions column to open the import menu.
You can drop in an Entity Archive file with one Serialized Player here from a compatible version of the game - or paste it in as text if you would prefer. After setting the archive, you can review a diff between the current and to-be-imported player models to confirm that you are about to do what you intended.
The Entity Archive system only supports player and guild entities by default, but it can be extended to support other, game-specific entity types as well. To do this you will need to implement two handler classes for each additional entity type: one for export and one for import.
As an example, exporting and importing for a MyEntity could be implemented as follows:
// By default, the data is exported directly from the database and no special
// handling is required.
public class ExportMyEntityHandler : SimpleExportEntityHandler
{
    public ExportMyEntityHandler() : base(EntityKindGame.MyEntity)
    {
    }
}

public class ImportMyEntityHandler : SimpleImportEntityHandler
{
    public ImportMyEntityHandler() : base(EntityKindGame.MyEntity)
    {
    }

    protected override async Task DoRemapModel(IModel model, EntityImportEntityIdRemapper remapper)
    {
        // Update EntityID references in the model
        MyEntityModel myEntityModel = (MyEntityModel)model;
        await myEntityModel.RemapEntityIdsAsync(remapper);
    }

    protected override void AssignBasicRuntimePropertiesToModel(IModel model)
    {
        MyEntityModel myEntityModel = (MyEntityModel)model;
        myEntityModel.GameConfig = ActiveGameConfig.BaselineGameConfig.SharedConfig;
        myEntityModel.LogicVersion = LogicVersion;
    }

    protected override async Task DoWrite(EntityId entityId, bool createFirst, IEntityMessagingApi asker)
    {
        // If createFirst is set, create a new empty entity at `entityId`
        // Using Asker, request Entity at `entityId` to import the `Payload` blob in `SchemaVersion`.
    }
}// Attach the importer and the exporter to your entity's EntityConfig
[EntityArchiveImporterExporter("myentity", typeof(ImportMyEntityHandler), typeof(ExportMyEntityHandler))]
public abstract class MyEntityConfig : PersistedEntityConfig
{The above code now allows importing archives with the custom entity, and exporting them via API. To finalize the work, we need to add the UI for exporting the entity on the LiveOps Dashboard. You can use the same Export Entity Button and Modal by using EntityActionExport component on our custom Entity View.